

Saturday, February 26, 2011


Tuesday, February 22, 2011
WIP Wednesday
I thought I would introduce a new little segment here on my Luv & Stitches blog. WIP (Work In Progress) Wednesday! I always seem to start these fun projects, but hardly ever get to finish them in a timely manner, now that I have to little ones to look after...sigh. So I figure if I post here, I can get my butt in gear and get some of these things finished! So I'll try to post my tribulations on Wednesdays, can't promise every Wednesday though! ;)
We bought this Ikea childrens Latt table back in September, the raw wood was just screaming for something to be put on it. So a few months later and lots of food, paint, and markers stains as well, I thought it was time to do something about that! Details on what I did to come, so stay tuned! Waiting for the weather to get better so I can finish the other chair and table...in progress!

We bought this Ikea childrens Latt table back in September, the raw wood was just screaming for something to be put on it. So a few months later and lots of food, paint, and markers stains as well, I thought it was time to do something about that! Details on what I did to come, so stay tuned! Waiting for the weather to get better so I can finish the other chair and table...in progress!

Saturday, February 19, 2011

Saturday, February 12, 2011

Thursday, February 10, 2011
Be Mine

My 2.5 year old is in preschool this year, and we had to make Valentines for his classmates! I didn't want to do the whole candy thing, so this is what I came up with...
Supplies:
Valentine Pencils - From the Dollar Tree
Glitter Glue - Dollar Tree
Googly Eyes - Dollar Tree
Pom-Poms - Dollar Tree
Fun Foam - Micheal's Craft Store
Tape
Constriction paper
Hot Glue
I have a die cutter, so I cut out the fun foam with my heart shape die cut. I hot glued on the googly eyes and pom-pom noses, then added glitter glue for the smiles.
Once the faces were dry, I taped the pencil to the back of the hearts and taped another smaller heart, made out of construction paper with my little ones name on it!

Easy Peasy Lemon Squeesy, and pretty cute to boot, no?
Tuesday, February 08, 2011
New Monogram Hat
I have a new hat in the shop!
It's just a twist on our regular ear flap hat, but now with a cute little Monogram.
Ashley, of Ashley Nelson Photography was kind enough to photograph it for me, here is her cutie patootie son modeling the new hat...


Get yours here ♥
It's just a twist on our regular ear flap hat, but now with a cute little Monogram.
Ashley, of Ashley Nelson Photography was kind enough to photograph it for me, here is her cutie patootie son modeling the new hat...
Get yours here ♥
Saturday, February 05, 2011

Monday, January 31, 2011
Homemade Play Dough
Today was one of those days...had to keep the kiddo happy & occupied, so homemade play dough it was! I found a ton of great recipes from this site...
Play Dough Recipes
We went with the cream-of-tarter recipe, because I had all the ingredients at hand.


Update: This stuff stayed fresh for a week!
Play Dough Recipes
We went with the cream-of-tarter recipe, because I had all the ingredients at hand.


Update: This stuff stayed fresh for a week!
Saturday, January 29, 2011

Saturday, January 22, 2011

Saturday, January 15, 2011

Saturday, January 08, 2011

Sunday, January 02, 2011
A day in the life: Weekend Picture 1
Picky eater.

I don't have enough discipline to do a real 365 photo set, but I can recap my week into one weekend photo. So here is the best of a typical day in the life of me!
Have a great weekend, and oh hey Happy New Year! :)

I don't have enough discipline to do a real 365 photo set, but I can recap my week into one weekend photo. So here is the best of a typical day in the life of me!
Have a great weekend, and oh hey Happy New Year! :)
Tuesday, December 14, 2010
My Baby's Stocking
I just finished making a stocking for the baby...
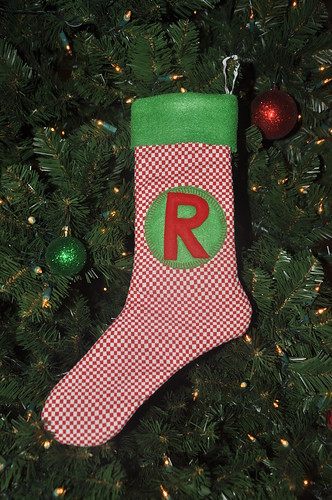
I was trying to match his brother's that I made a couple years ago!
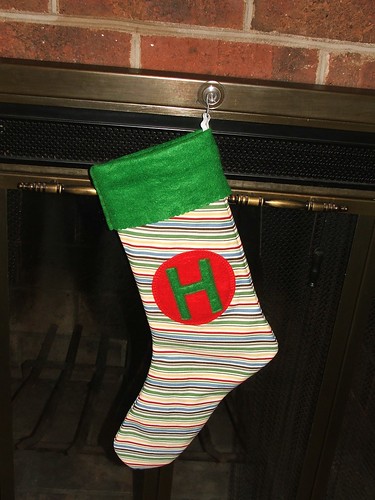
The stockings are just made out of a quilting weight cotton on the outside, inside I used fusible fleece, and the folded over top and letters are made out of regular craft felt. I used a stocking template that I found on Martha Stewart.com and improvised the rest!
I was trying to match his brother's that I made a couple years ago!
The stockings are just made out of a quilting weight cotton on the outside, inside I used fusible fleece, and the folded over top and letters are made out of regular craft felt. I used a stocking template that I found on Martha Stewart.com and improvised the rest!
Saturday, December 11, 2010
Paper Snowflakes
My sister in law came over to make some paper snowflakes with me and the boys, and she said she used to make snowflakes out of coffee filters. So we tried it, and they turned out better than the regular paper kind. Since the filters are already circular, they were made into perfect snow flakes!
Just fold the filter in half, then in half a couple more times and make your cuts, it was super fun!

Here is a site to help with the cuts...
http://www.papersnowflakes.com/patterns.htm
Just fold the filter in half, then in half a couple more times and make your cuts, it was super fun!
Here is a site to help with the cuts...
http://www.papersnowflakes.com/patterns.htm
Friday, December 03, 2010
My Under $5 Holiday Wreath
I kind of threw this together last minute, but for under $5 I thought it turned out cute!

Wreath form I got ant my local craft store, on sale for $1.99
Bunches of berries at the same craft store, $0.59 each
Poinsettias I had from another decoration that I bought from the Dollar Tree a few years ago, so basically free
Round ball ornaments also came from the Dollar Tree, I think it was a 15 pack for $1
Total= $4.17
Just hot glued all the pieces on the wreath and easy peasy Holiday Wreath!

Wreath form I got ant my local craft store, on sale for $1.99
Bunches of berries at the same craft store, $0.59 each
Poinsettias I had from another decoration that I bought from the Dollar Tree a few years ago, so basically free
Round ball ornaments also came from the Dollar Tree, I think it was a 15 pack for $1
Total= $4.17
Just hot glued all the pieces on the wreath and easy peasy Holiday Wreath!
Wednesday, December 01, 2010
Beaded Candy Cane Onaments
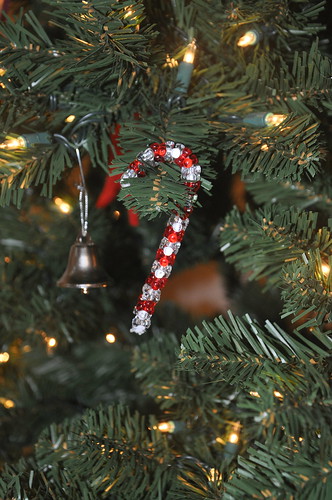
These are so easy to make. Some of you have probably made them before, I know I made them when I was a kid and just had my 2.5 year old help me make some to fill in our tree!
Beaded Candy Cane Ornament
Supplies:
12" White chenille pipe cleaners
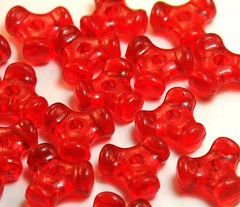
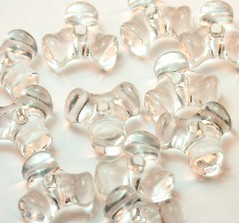
20 Clear translucent tri-beads
18 Red translucent tri-beads
Scissors
Instructions:
1. Measure and cut the pipe cleaners to 6 inches for each ornament
2. Start with two clear beads turn end of the pipe cleaner around the bead.
3. Feed the rest of the beads continuing with 2 red beads, followed by 2 clear beads etc, until all the beads are used up.
4. When the last bead is added, bend the pipe cleaner around the bead.
5. Bend the top into a candy cane shape.
You can add ribbon to hang on your tree, but we just hang the ornament as is.
You can also use all translucent beads or green and translucent beads to make pretty variations, enjoy!
Beaded Candy Cane Ornament
Supplies:
12" White chenille pipe cleaners
20 Clear translucent tri-beads
18 Red translucent tri-beads
Scissors
Instructions:
1. Measure and cut the pipe cleaners to 6 inches for each ornament
2. Start with two clear beads turn end of the pipe cleaner around the bead.
3. Feed the rest of the beads continuing with 2 red beads, followed by 2 clear beads etc, until all the beads are used up.
4. When the last bead is added, bend the pipe cleaner around the bead.
5. Bend the top into a candy cane shape.
You can add ribbon to hang on your tree, but we just hang the ornament as is.
You can also use all translucent beads or green and translucent beads to make pretty variations, enjoy!
Tuesday, June 08, 2010
Bread and Butter Pickles!
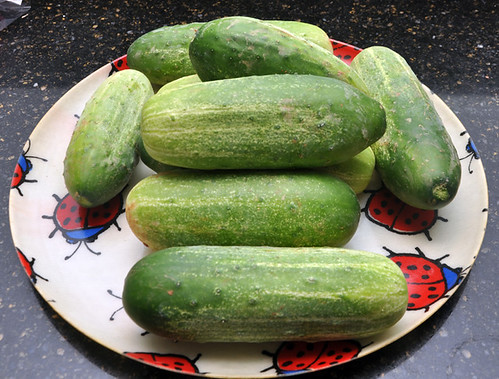
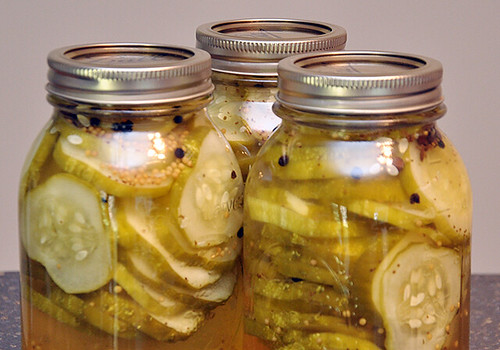
My neighbor, just brought over 7 pounds of cucumbers from her garden this afternoon. So I took it upon my self to make some bread and butter pickles! Can't wait to eat them in about 4 weeks or so!
Recipe
Ingredients
6-7 pounds of pickling cucumbers - I used regular, but smaller pickling cucumbers will make for a crisper pickle
5 cups white vinegar
5 cups sugar (I only used 3 cups)
1 tablespoon of pickling salt
1/2 tablespoon mustard seeds
1/2 tablespoon pepper corns
Pinch of ground cloves or 1/2 teaspoon of pickling spice
1 teaspoon turmeric (optional for color)
Directions
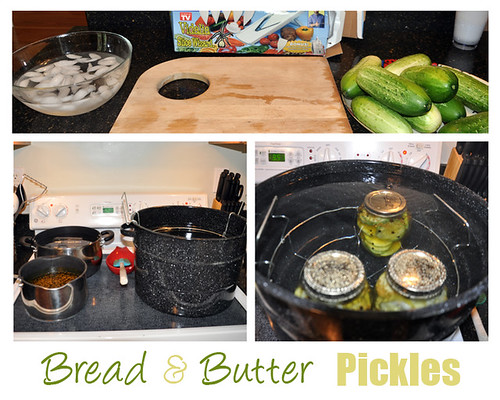
Combine vinegar, sugar, and spices in a pot and bring to boil, let simmer for about 5 minutes. Slice cukes 1/4" thick and pack in hot jars. Slowly pour the hot pickling liquid over the cucumber slices, leaving about a 1/2" head space. Make sure there are no air bubbles by running a knife or chop stick around the inside of the jars, wipe rim clean, add lids and finger tighten. Process in a hot water bath for 15 minutes. Wait 3-4 weeks before eating. Enjoy!
Recipe
Ingredients
6-7 pounds of pickling cucumbers - I used regular, but smaller pickling cucumbers will make for a crisper pickle
5 cups white vinegar
5 cups sugar (I only used 3 cups)
1 tablespoon of pickling salt
1/2 tablespoon mustard seeds
1/2 tablespoon pepper corns
Pinch of ground cloves or 1/2 teaspoon of pickling spice
1 teaspoon turmeric (optional for color)
Directions
Combine vinegar, sugar, and spices in a pot and bring to boil, let simmer for about 5 minutes. Slice cukes 1/4" thick and pack in hot jars. Slowly pour the hot pickling liquid over the cucumber slices, leaving about a 1/2" head space. Make sure there are no air bubbles by running a knife or chop stick around the inside of the jars, wipe rim clean, add lids and finger tighten. Process in a hot water bath for 15 minutes. Wait 3-4 weeks before eating. Enjoy!
Thursday, April 15, 2010
Sunday, February 28, 2010
Subscribe to:
Posts (Atom)