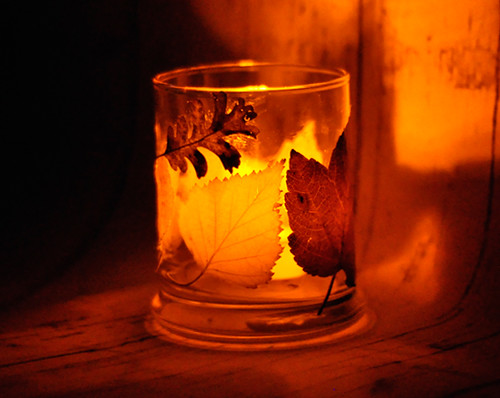
Dollar Tree votives, tea lights, glue stick, fall leaves.... last minute holiday table decor!
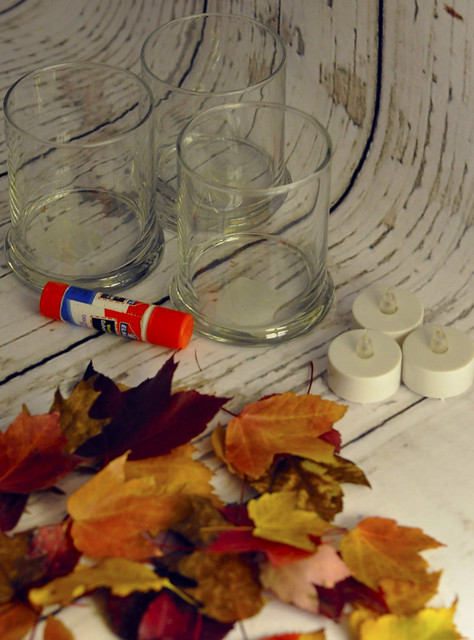
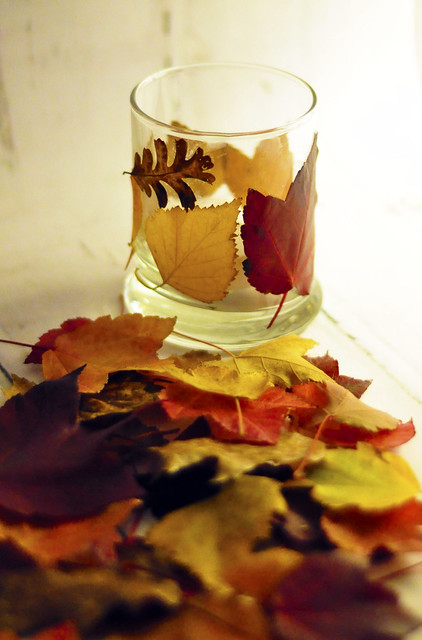
Collect those pretty Fall leaves from outside. Put some washable glue on the back of the leaves, then place on your glass votive, add a battery operated tea light and enjoy! Once you are done with these, simply peel off the leaves and wash the glass with soap and water :)
These will be on my Thanksgiving table!


Tuesday, November 22, 2011
Fall Votive
Wednesday, November 09, 2011
Friday, October 14, 2011
Twenty Pounds of Apples
I recently took the kiddos to an apple orchard that is about 30 minutes from our home. Apple Hill. I've been going here since I was a kid and it was fun to take the littles up there to start a new Fall tradition!
Anyway this place has fresh picked apples, natural apple juice, apple donuts & fritters (my personal favorite) and every other kind of apple something or another you can think of!
Needless to say I came home with a lovely bounty of appley goodness, which included twenty pounds of apples for $19.50! What do you do with 20 pounds of local Jonathan apples you ask?
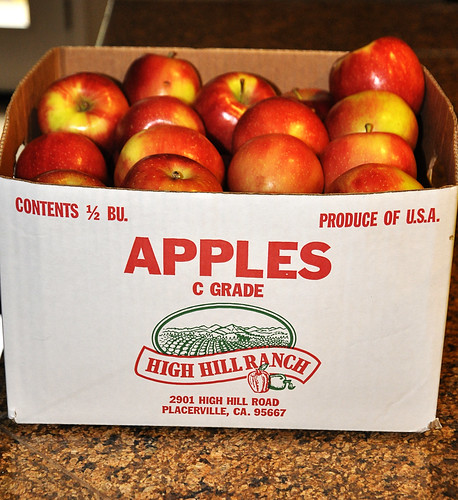
I'll show you...
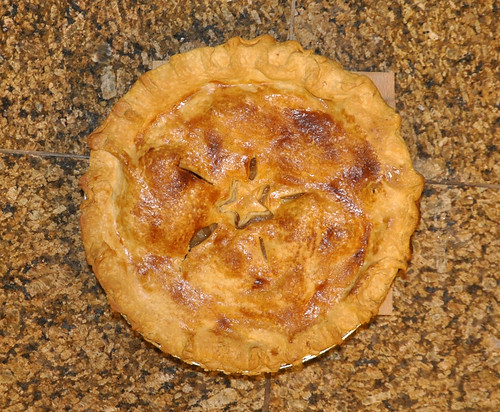
Apple Pie. I actually made two, but when warm apple pie comes out of the oven it's hard to photograph when it's almost half eaten!
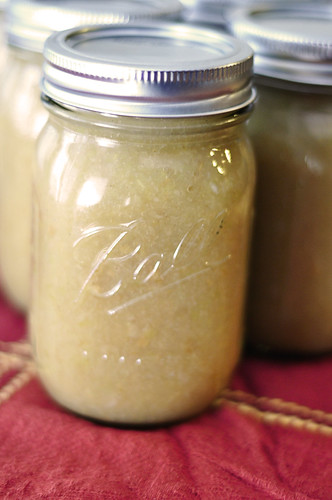
Apple Sauce. Made about 12 pints, so good and just a little bit of sugar was needed!
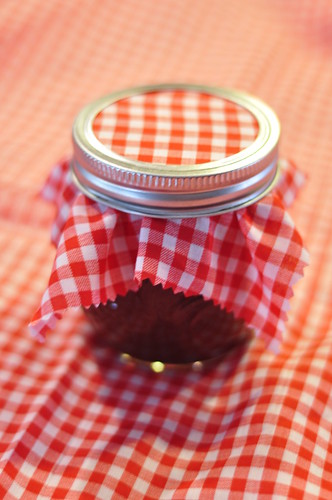
Then I turned the applesauce into Apple Butter! This recipe is what I used to make it (in the crock pot!), and it is to die for good!
And we still had about 15 apples left over for snacking!
Whew, I think I'm all appled out, until next year! ;)
Anyway this place has fresh picked apples, natural apple juice, apple donuts & fritters (my personal favorite) and every other kind of apple something or another you can think of!
Needless to say I came home with a lovely bounty of appley goodness, which included twenty pounds of apples for $19.50! What do you do with 20 pounds of local Jonathan apples you ask?
I'll show you...
Apple Pie. I actually made two, but when warm apple pie comes out of the oven it's hard to photograph when it's almost half eaten!
Apple Sauce. Made about 12 pints, so good and just a little bit of sugar was needed!
Then I turned the applesauce into Apple Butter! This recipe is what I used to make it (in the crock pot!), and it is to die for good!
And we still had about 15 apples left over for snacking!
Whew, I think I'm all appled out, until next year! ;)
Monday, October 10, 2011
Halloween Candy Corn Wreath
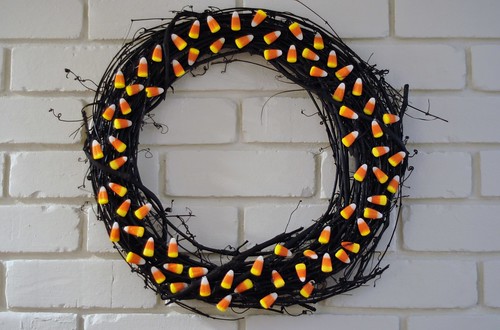
My Halloween wreath made with hot glued candy corn! Bought the grapevine wreath at Micheal's, spray painted it black, and there you have it! I'll be adding it to the front door with some orange ribbon later.
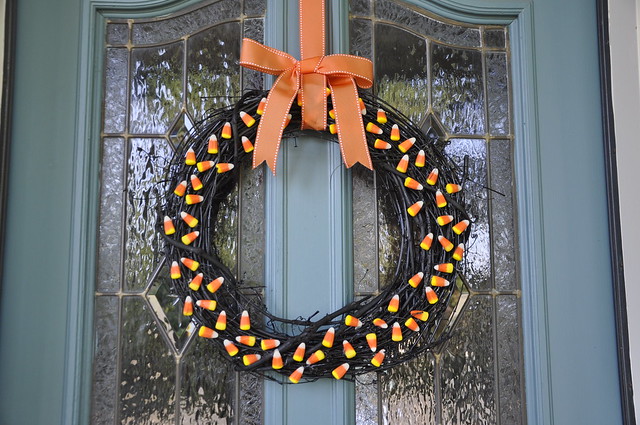
Update: 10/24/2011
Here it is finished and hanging from the front door. The only thing I would do different a (and still might do) is apply a clear spray varnish on the candy corn, because after a few days of being out doors they are starting to get moist (ew) ;P
Saturday, June 04, 2011
Saturday, May 28, 2011
Friday, May 27, 2011
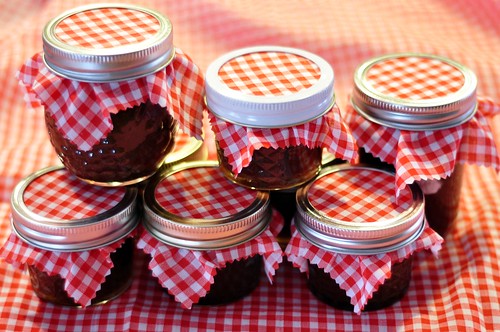
Strawberry Preserves
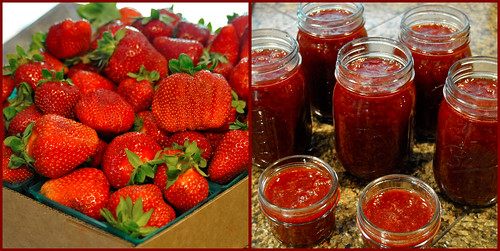
Bought a half flat of strawberries today, from a local strawberry stand.
Made five pints and two 4 oz jars of low sugar preserves, yum yum!
Wednesday, May 25, 2011
Fruit Salad Baby Buggy
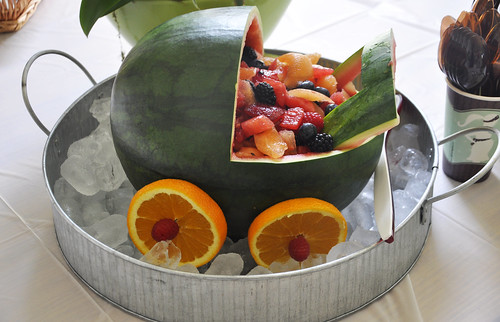
Made this for my sister in-laws baby shower over the weekend. It came out so pretty, I just wanted to share!
Directions on how to make one are here.
Saturday, May 21, 2011
Saturday, May 14, 2011
Tuesday, May 10, 2011
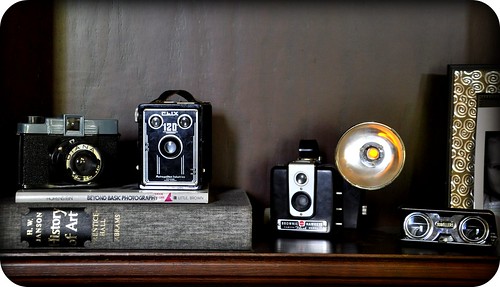
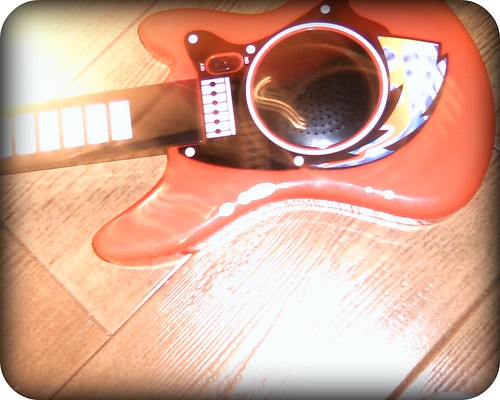
Vintage Camera Night Light
I have a small collection of vintage cameras, which I have lovingly displayed in a corner of my home. I had one camera in particular, a Brownie Hawkeye, that had seen it's better days, but saw saw that the broken flash could be re-purposed into something awesome!
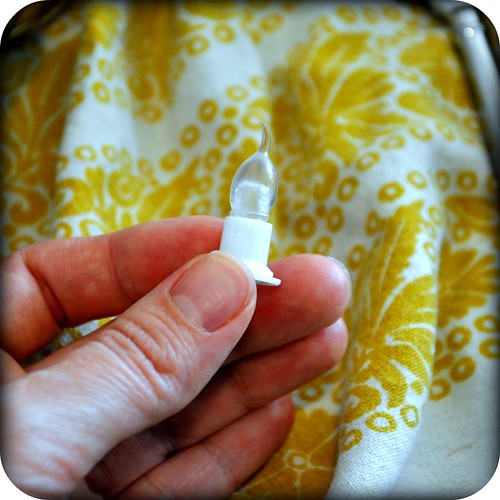
I had on hand a LCD "tea light" that I bought from the dollar store around Halloween time, and it was just the right size for this project. I armed myself with the latest and greatest tools (a butter knife, and two screw drivers). Then I was all set to turn this old camera and it's flash into some sah-weet mood lighting.
Sorry for the shoddy photos, I did this project on a whim, and took the pics as and afterthought!
Here's how it worked...
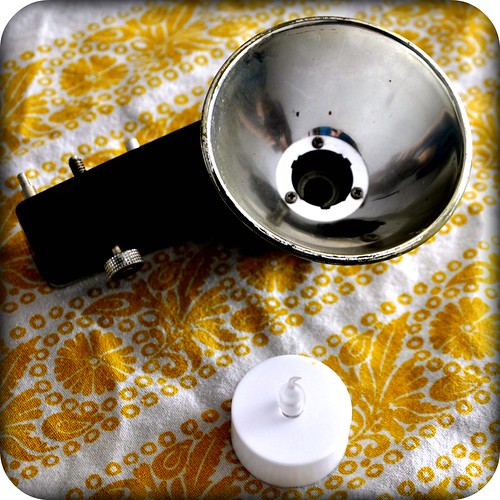

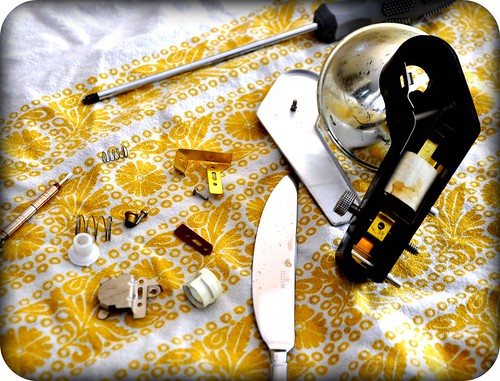
Had to pry this baby open with the butter knife, it took some strength let me tell ya!
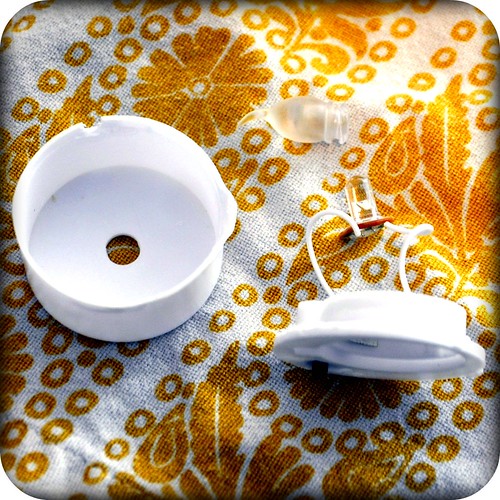
This little piece was already part of the flash housing and fit the rubber part of the LCD light perfectly.
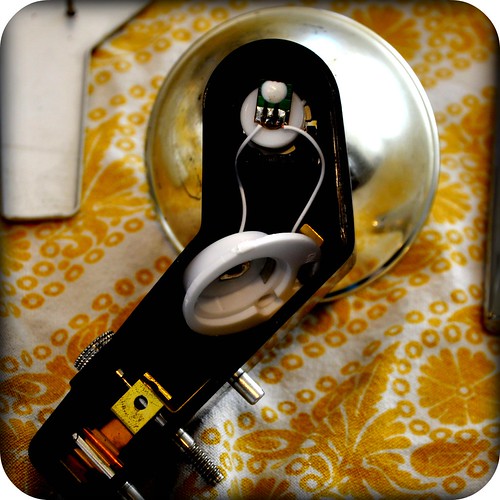
After the light was in place I assembled all the pieces back together, it all fit like a dream!

All done.
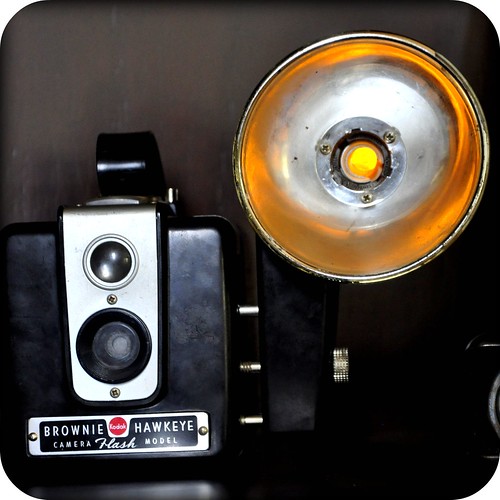
The only downside of this piece is that you have to unscrew the back of the flash plate every time you want to turn on & off the light, but it all came together rather easily and I'm super pleased with the end result!
♥
I had on hand a LCD "tea light" that I bought from the dollar store around Halloween time, and it was just the right size for this project. I armed myself with the latest and greatest tools (a butter knife, and two screw drivers). Then I was all set to turn this old camera and it's flash into some sah-weet mood lighting.
Sorry for the shoddy photos, I did this project on a whim, and took the pics as and afterthought!
Here's how it worked...
Had to pry this baby open with the butter knife, it took some strength let me tell ya!
This little piece was already part of the flash housing and fit the rubber part of the LCD light perfectly.
After the light was in place I assembled all the pieces back together, it all fit like a dream!
All done.
The only downside of this piece is that you have to unscrew the back of the flash plate every time you want to turn on & off the light, but it all came together rather easily and I'm super pleased with the end result!
♥
Saturday, May 07, 2011
Friday, May 06, 2011
Freebie Friday : Homemade Pennant Bunting
I love the idea of hanging pennants/bunting, whether it be made from paper, recycled materials, or fabric. It adds such a touch of happy to any room. I had big plans to make both of my boys personalized bunting for each of their rooms, but never seem to have the time to sit at my sewing machine anymore. I do however have mad skills on the computer from time to time so, I thought why not make printable paper pennants!
My little Holden is turning three next week (sniff sniff) I thought these pennants would be a perfect little happy b-day surprise for his room...
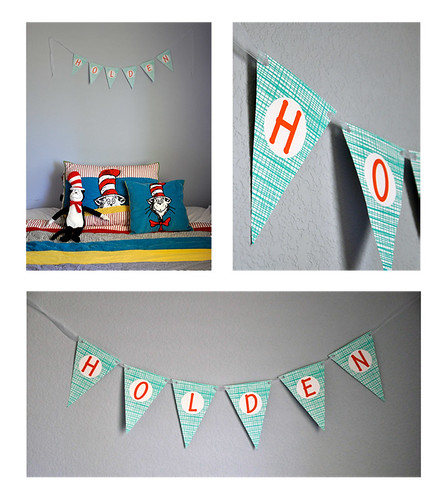
Since I love a good freebie and like to share with my readers, I'm offering you a free printout of these pennants. Download it & save it to your computer, add the font you wish then print onto cardstock (multiple times if you wish) use a hole punch at the corners, add some ribbon and attach to your wall!
This is for your personal use only, if you make some of this pennant bunting from this printout I would love to see it! So don't be afraid to let me know, link back here, or upload a pic to my Flickr Pool!
Enjoy :)
Free Pennant Bunting Digital PDF, Click the picture below...

xo
My little Holden is turning three next week (sniff sniff) I thought these pennants would be a perfect little happy b-day surprise for his room...
Since I love a good freebie and like to share with my readers, I'm offering you a free printout of these pennants. Download it & save it to your computer, add the font you wish then print onto cardstock (multiple times if you wish) use a hole punch at the corners, add some ribbon and attach to your wall!
This is for your personal use only, if you make some of this pennant bunting from this printout I would love to see it! So don't be afraid to let me know, link back here, or upload a pic to my Flickr Pool!
Enjoy :)
Free Pennant Bunting Digital PDF, Click the picture below...
xo
Tuesday, May 03, 2011
Monday, May 02, 2011
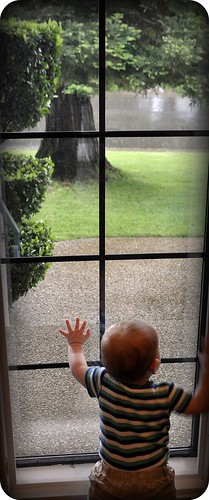
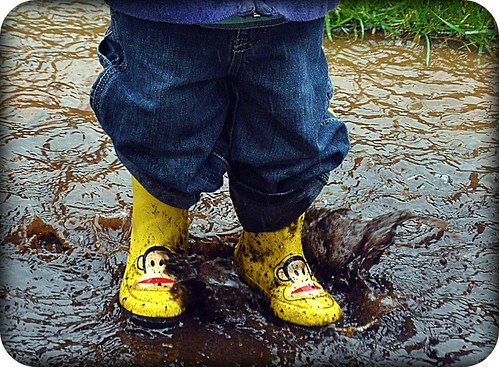
Faux Wood Floor Drop
Something you may not know about me, or maybe you can tell...I dabble in photography. I actually studied photography (a little bit) back in college, you know the REAL kind of photography re: film ,chemicals, and what not. I miss those days.
Anyway now that I have kids, digital photography is addicting! I stumbled across this awesome site a few weeks ago, Lemon Drop Stop, they make backdrops and floor drops for photographers. When I saw the faux wood floors, I just had to have one!
See, isn't it cool?

Now if photographing kids ain't your thang, here's a pic with one of my hobo bags for my Etsy shop...

So many possibilities I tell ya!
If you would like to win one of these awesome backdrops, head on over to the Laura Winslow Photography Blog. She is hosting an awesome giveaway that's making this photog mama drool! :D
Saturday, April 30, 2011
Tuesday, April 26, 2011
Plush Owl Pattern Revisited!
Back by popular demand!! The first pattern got lost somewhere on the interwebs when I shut down my website (sorry about that!) so please enjoy the new one!
Plush Owl Pattern
copyright www.HeydayFashion.com
FOR PERSONAL USE ONLY NO RECREATING FOR RESALE

Owl Body ----> Here
Owl Parts Placement ----> Here
Owl Parts ----> Here
Instructions ----> Here and Here.
<3
Plush Owl Pattern
copyright www.HeydayFashion.com
FOR PERSONAL USE ONLY NO RECREATING FOR RESALE
Owl Body ----> Here
Owl Parts Placement ----> Here
Owl Parts ----> Here
Instructions ----> Here and Here.
<3
Saturday, April 23, 2011

Monday, April 18, 2011
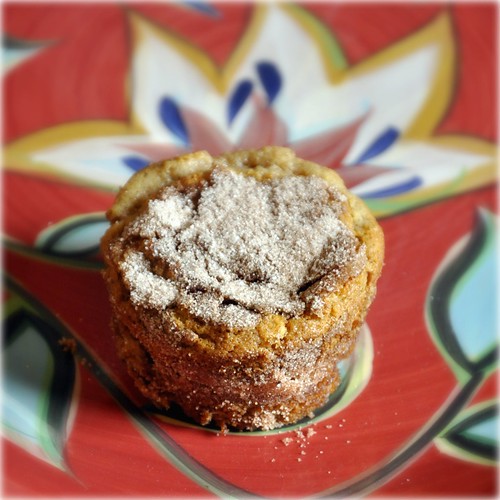
Snickerdoodle Muffin
I'm always baking snickerdoodle cookies for my family (they are a big hit here) and when I came across a snicker doodle muffin recipe, I had to try it! The recipe I found was missing something, so I adapted it to suit my tastes, and man does this make a good muffin, Enjoy!
Snickerdoodle Muffins
Ingredients:
1 & 1/2 cup flour
1 cup rolled oats
1 cup white sugar
2/3 cup packed brown sugar
1 eggs
1 & 1/2 cup milk
1/2 cup softened butter
1 tsp vanilla
1 tsp baking powder
1 tsp baking soda
Topping:
1 tbsp cinnamon
3/4 cup white sugar
Directions:
Cream together eggs, butter, sugars, vanilla, and milk.
In a separate bowl mix all dry ingredients together, flour, oats, baking powder and baking soda. Slowly add dry ingredients to creamed mixture, beat until everything is incorporated well.
Fill greased muffin cups 2/3 of the way full with batter. Mix the topping together 3/4 cup of sugar plus 1 tbsp of cinnamon, and sprinkle generously over muffin batter cups before baking.
Bake at 400 for 15 - 18 minutes.
Makes approx. 18 muffins
I made these in my Pampered Chef stoneware muffin pan, and they were delish!!
Saturday, April 16, 2011
Saturday, April 09, 2011
Saturday, April 02, 2011

Friday, April 01, 2011
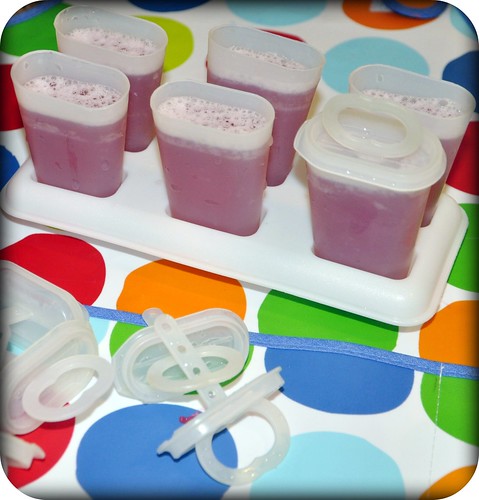
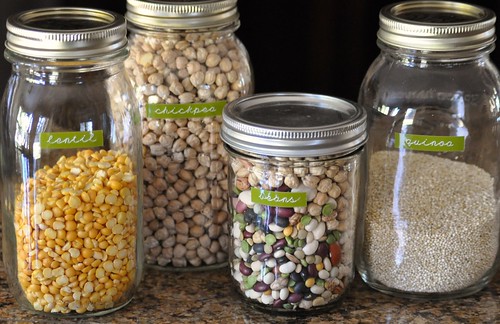
(Easter) Egg Shakers
I made these last year and forgot to post about it! My toddler was in Kindermusik last year and loved the little egg shakers they used in class. Instead of shelling out the big bucks for theirs, I made ten for under two bucks!
Found the eggs at Walmart, these were the only plastic eggs I found that didn't have little holes in the top or bottom of the egg, which is crucial to this project (you don't want any moisture to get in!)
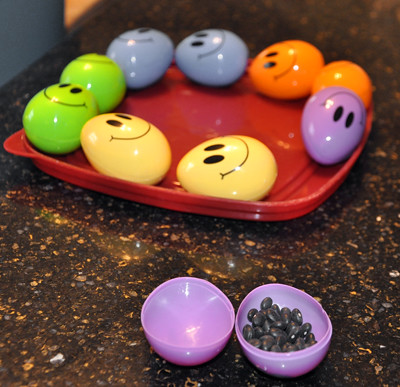
Anyway, I filled the eggs with what I hand on hand: black beans, lentils, popcorn kernels, and rice. Then glued them shut with a nice strong craft glue like E6000. The rice and the popcorn kernels make the best sound! This is a great inexpensive project for you little music lover, and a year later they have held up well!
Found the eggs at Walmart, these were the only plastic eggs I found that didn't have little holes in the top or bottom of the egg, which is crucial to this project (you don't want any moisture to get in!)
Anyway, I filled the eggs with what I hand on hand: black beans, lentils, popcorn kernels, and rice. Then glued them shut with a nice strong craft glue like E6000. The rice and the popcorn kernels make the best sound! This is a great inexpensive project for you little music lover, and a year later they have held up well!
Saturday, March 26, 2011
Wednesday, March 23, 2011
Saturday, March 19, 2011
Wednesday, March 16, 2011
Saturday, March 12, 2011
Saturday, March 05, 2011

Saturday, February 26, 2011

Tuesday, February 22, 2011
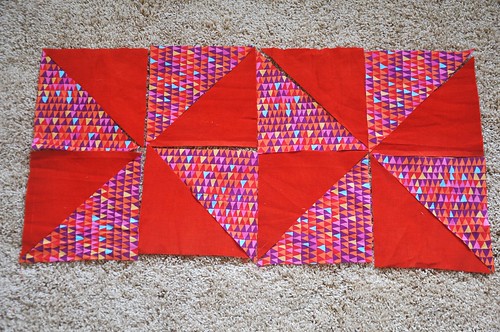
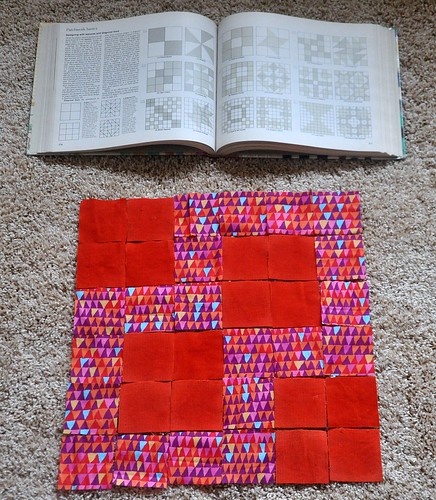
WIP Wednesday
I thought I would introduce a new little segment here on my Luv & Stitches blog. WIP (Work In Progress) Wednesday! I always seem to start these fun projects, but hardly ever get to finish them in a timely manner, now that I have to little ones to look after...sigh. So I figure if I post here, I can get my butt in gear and get some of these things finished! So I'll try to post my tribulations on Wednesdays, can't promise every Wednesday though! ;)
We bought this Ikea childrens Latt table back in September, the raw wood was just screaming for something to be put on it. So a few months later and lots of food, paint, and markers stains as well, I thought it was time to do something about that! Details on what I did to come, so stay tuned! Waiting for the weather to get better so I can finish the other chair and table...in progress!

We bought this Ikea childrens Latt table back in September, the raw wood was just screaming for something to be put on it. So a few months later and lots of food, paint, and markers stains as well, I thought it was time to do something about that! Details on what I did to come, so stay tuned! Waiting for the weather to get better so I can finish the other chair and table...in progress!

Saturday, February 19, 2011

Saturday, February 12, 2011

Subscribe to:
Posts (Atom)